VacuPac
In a design and entrepreneurship class titled "Making It," product ideas were pitched and the top 4 products were made in groups. I was the lead engineer of the group that pursued the idea of a suitcase that can vacuum seal.

We began by investigating the current competitors in the market by looking at various technologies and ways to seal and compress clothing. We found that in the regular vacuum sealing bags, the end product was distorted and misshapen, but through the one-way valve they achieved a sizable reduction in space.

We then tried placing two parallel plates inside the vacuum sealing bag to see if we could attain more uniform compression.
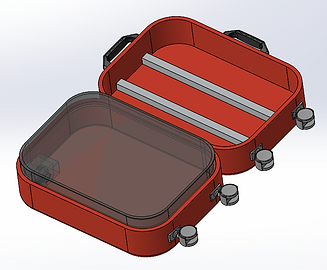
Design 1
Design 2
We then had to decide on which design to pursue. Design 1 was a suitcase with an airtight compartment that vacuum seals on one side. The other side was left empty as a non-compression section. Design 2 had an expandable section; the entire suitcase would compress to a standard carry-on size. The suitcase could then be zipped up to its smaller size (see above).

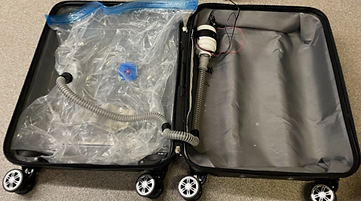

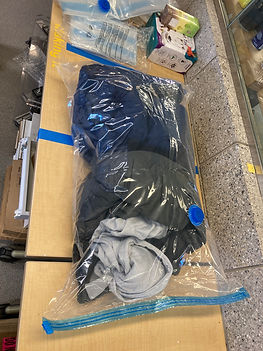
We then began creating prototypes. We attached a pump to the one-way valve in one of the airtight bags. We then cut the airtight bag to size, resealed it, and placed a laser-cut acrylic sheet inside the bag for the more uniform compression. This was our first working prototype.
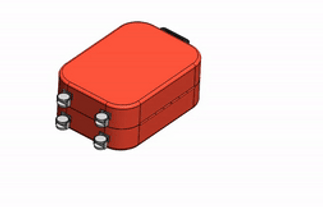
I then used SolidWorks to make a CAD model of the suitcase design we wanted to pursue. This was done to better understand how we wanted the suitcase to look and how to improve our prototype.


One problem we ran into was that the pre-made bags were not the correct dimensions for our suitcase and our needs. This led us to make our own airtight bag using an airtight zipper and fastening it to the bag with duct tape. We made a second prototype for the internal bag using thermoplastic polyurethane and an airtight zipper made from the same material.


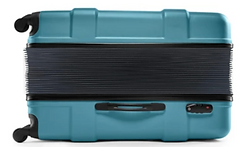
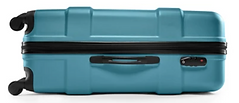
We constructed our final prototype using a battery powered pump and inserting the airtight bag into one of the sides of the suitcase.
